|
|


 03-02-2009, 12:25 AM
I know there are kits out there for doing this but I had all this stuff (minus the deep cycle battery) laying around. So I whipped up a dual battery set up that I think anyone could do. This system gives you three modes with a DPDT switch. Obviously the position of the aux battery in this system makes it necessary to remove your OE air box. An alternative to that would be to simply mount your aux battery in another position.
Switch positions:
1: Ignition on switches solenoid on. This gives you complete battery isolation with the key off without worrying about the batteries fighting each other for charge equalization. They are completely isolated in this position, and only connect in parallel when the ignition is on. It also lets you run all you auxiliary crap of the aux/deep cycle battery, without worrying about running your primary battery down.
2: Solenoid off all the time. This puts you straight on your primary starting battery.
3: Primary/aux batteries connected all the time. This is the mode you would select if your primary (starting) battery shit the bed on you. This will force both batteries to be connected together in parallel all the time
Parts:
- DPDT switch. You can get this from most generic auto parts joints. It has six connecters on the back and three positions. I get mine from Home Depot for about $5
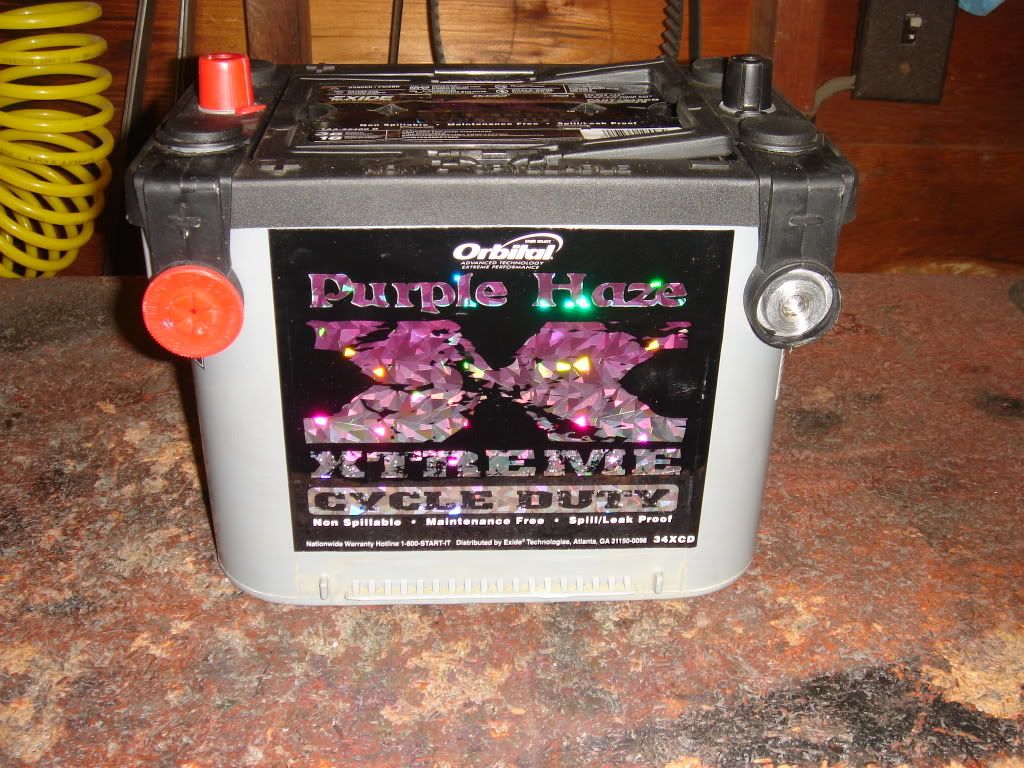
- Batteries. I suppose you could use whatever you want. I chose to go with a red top for primary starting, and a Exide Deep Purple deep cycle for my aux battery.
- 200A continuous duty solenoid. I like the Stancor 586-902 for this. They run about $50.
- 15’ 1/0AWG. You may be able to go with some 2AWG but in this case bigger is only better. Check e-bay for cheap battery cable.
- 1/0AWG terminal ends. I used 4.
- 20’ 14AWG, for connecting the solenoid to the switch.
- ¾” heat shrink.
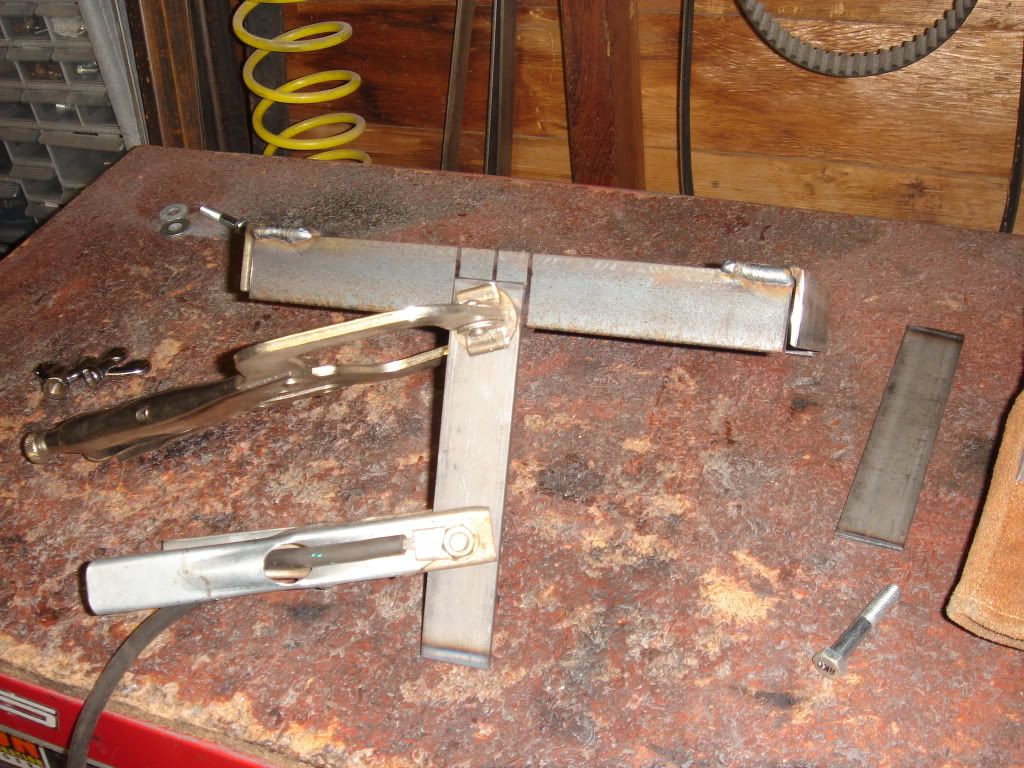
- Angle iron and flat stock for making the battery tray.
- 2 top post terminal ends for connecting to the aux battery.
- 2 side post terminal ends for connecting to the primary battery.
Here is the basic idea:
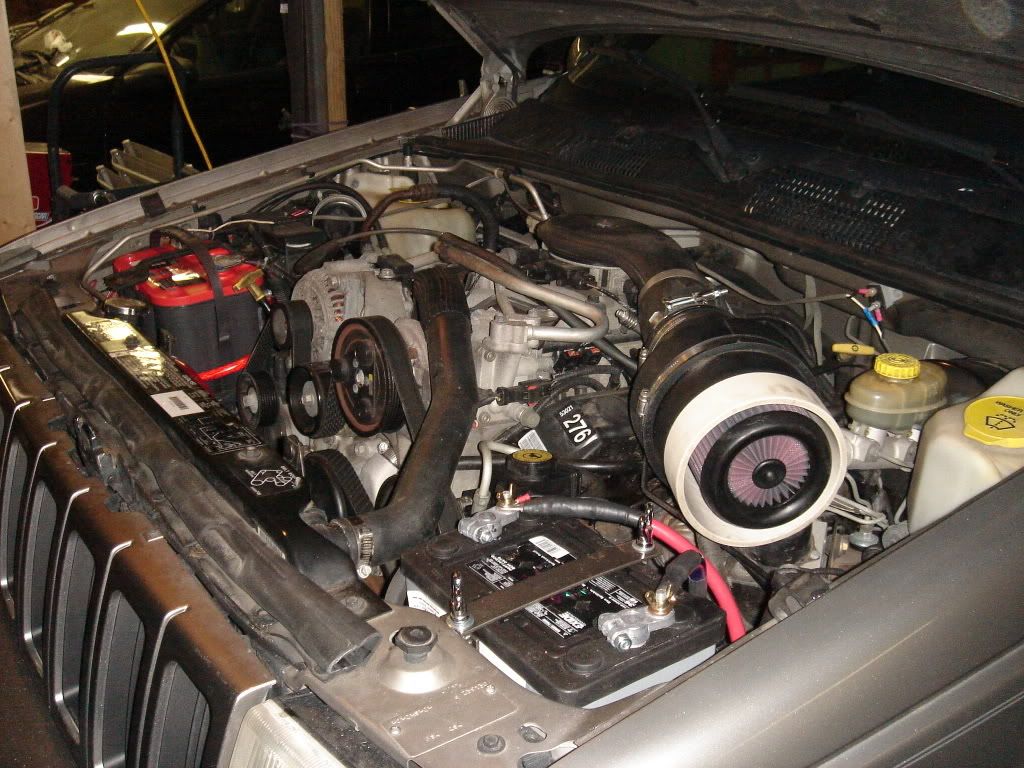
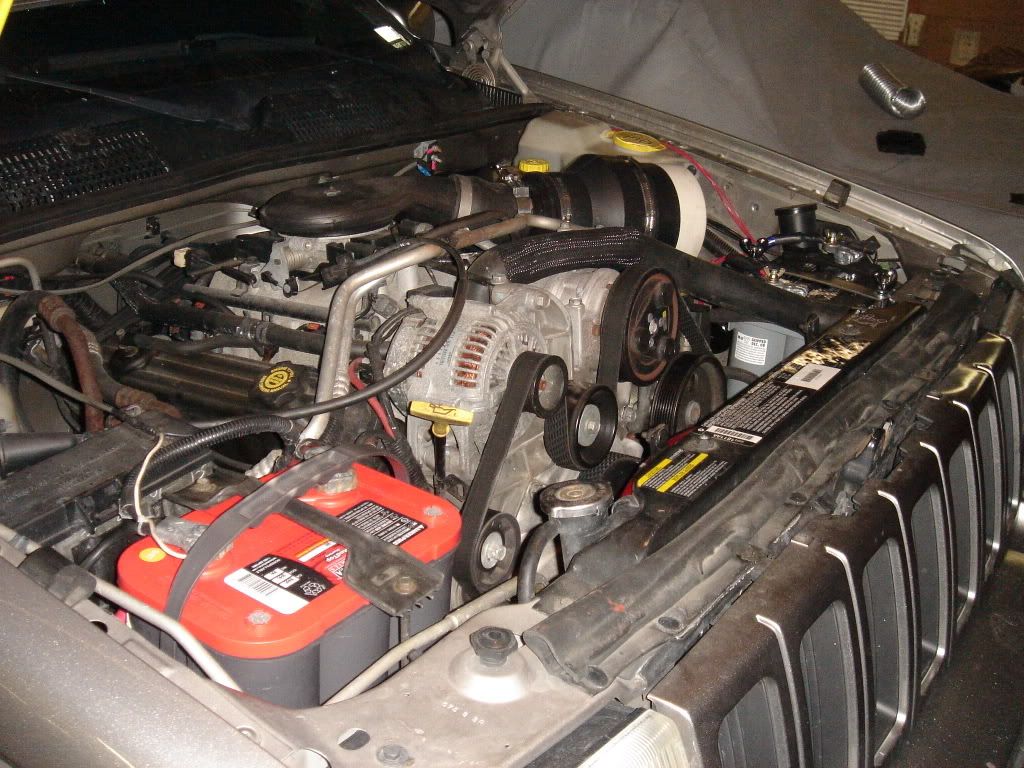
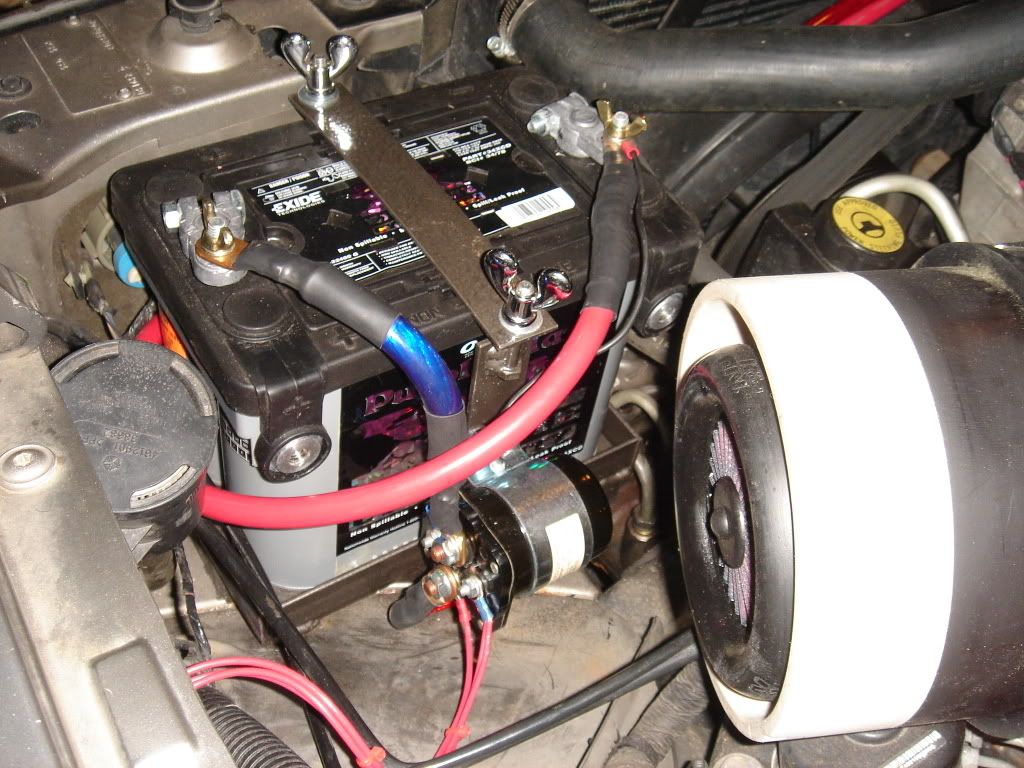
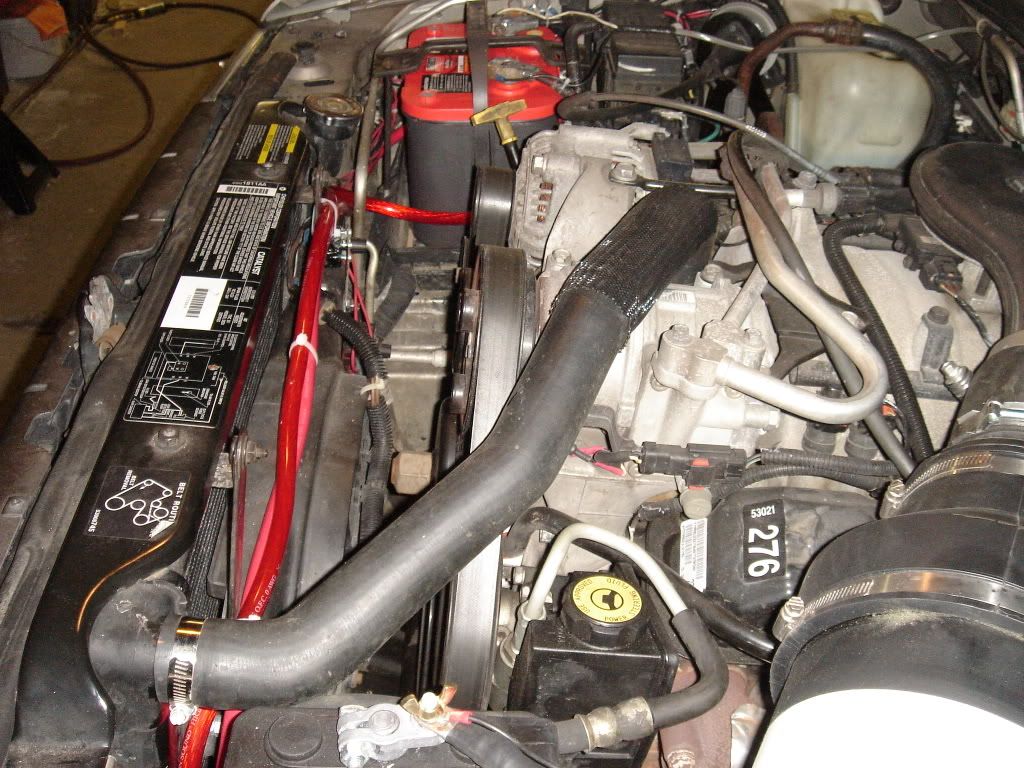
This is how it all looks when its finished:
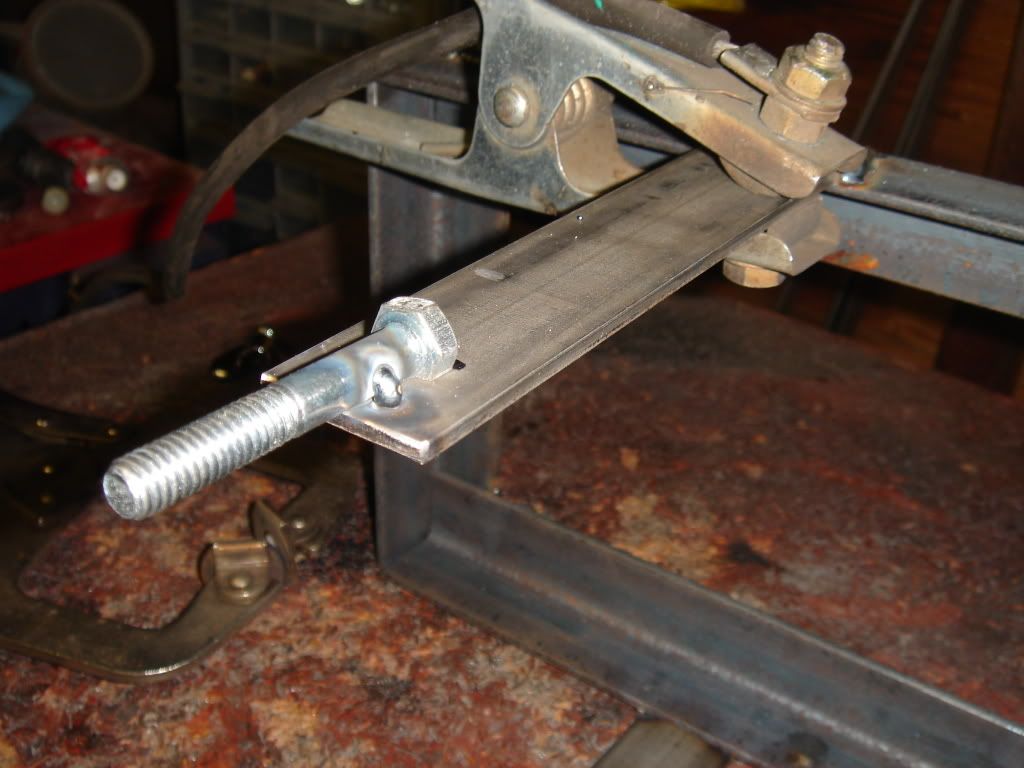
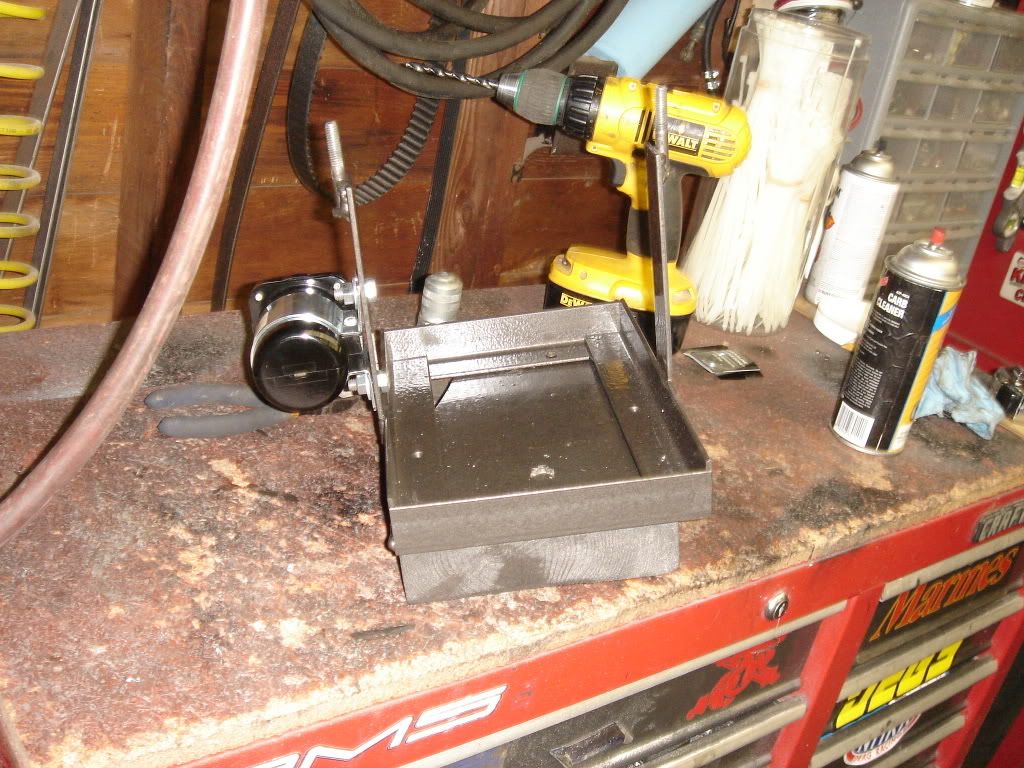
I started by making a battery tray for the aux battery. My aux battery is a Exide deep purple. I read some great reviews on these and for $175 it was a better deal than a comparable yellow top. It also has a greater RC than the yellow top.
This is the third battery tray I have made this way. I’m pretty happy with them. Simple, cheap, easy to build.
I needed to space the tray up about 2" to get it fit without interfering with the contour of the wheel well. I had some 2x6 laying around so I made a template to match the contour, then I traced and cut out a spacer with the 2x6.
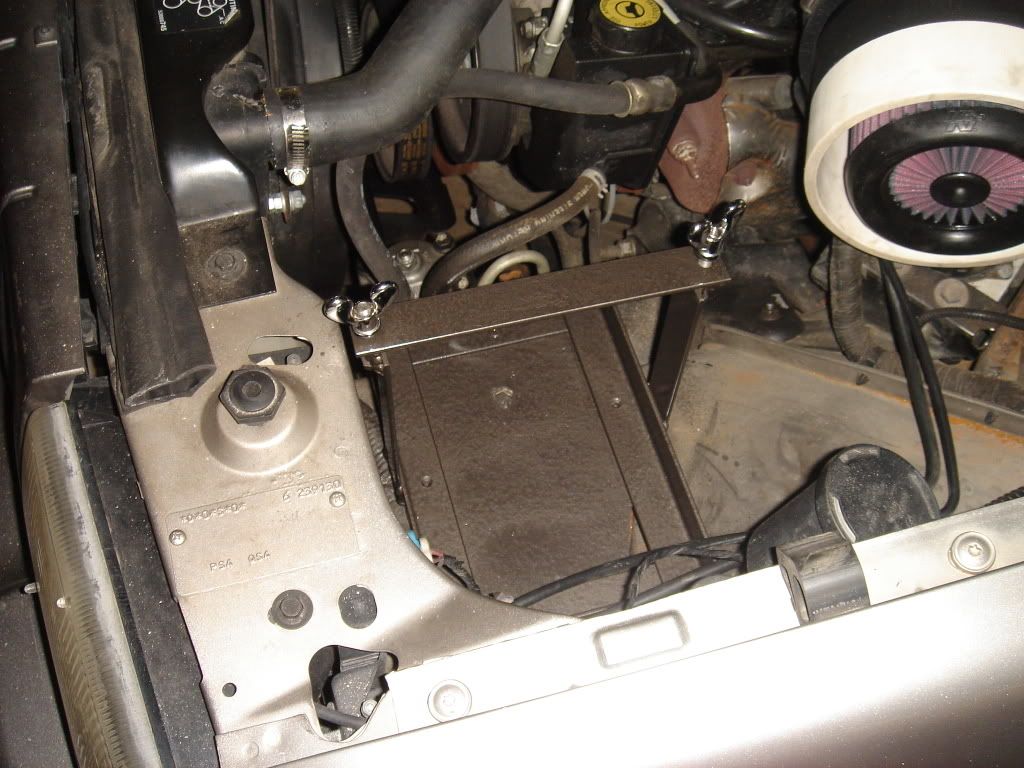
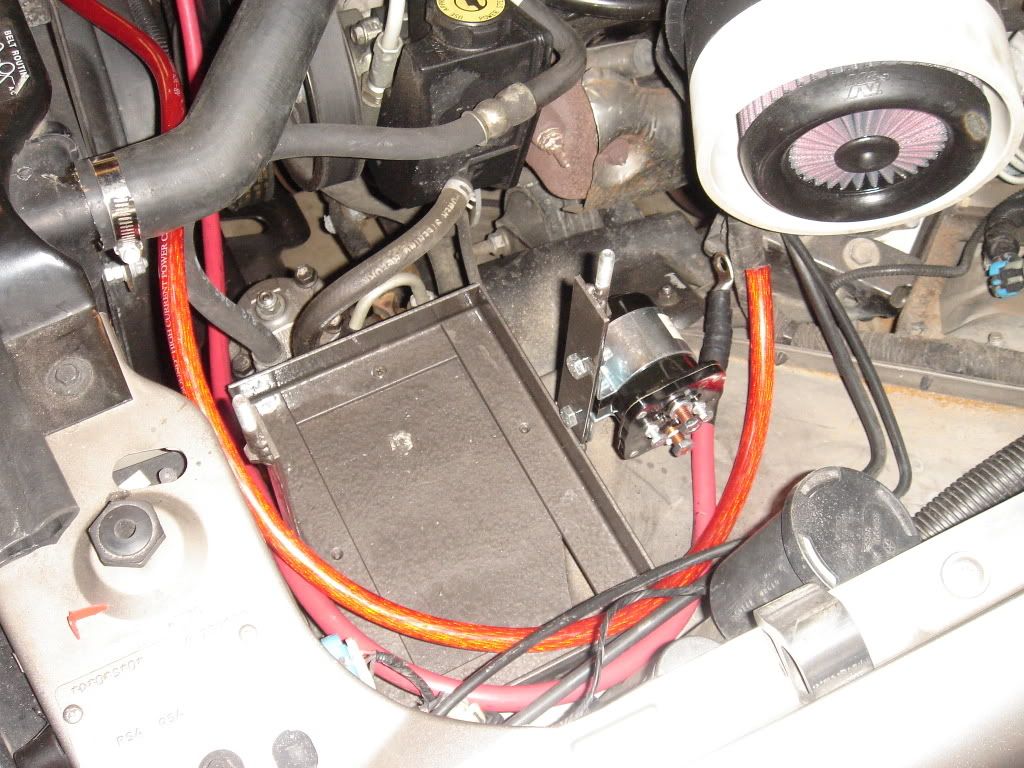
Fits in the empty OE air box location very well:
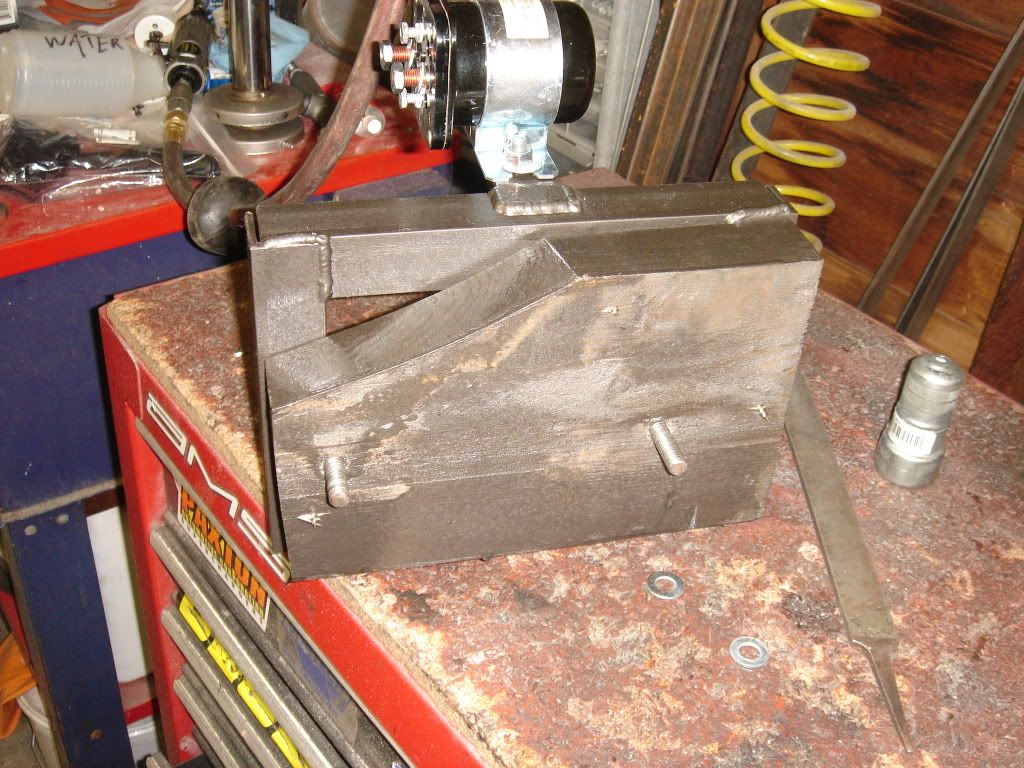
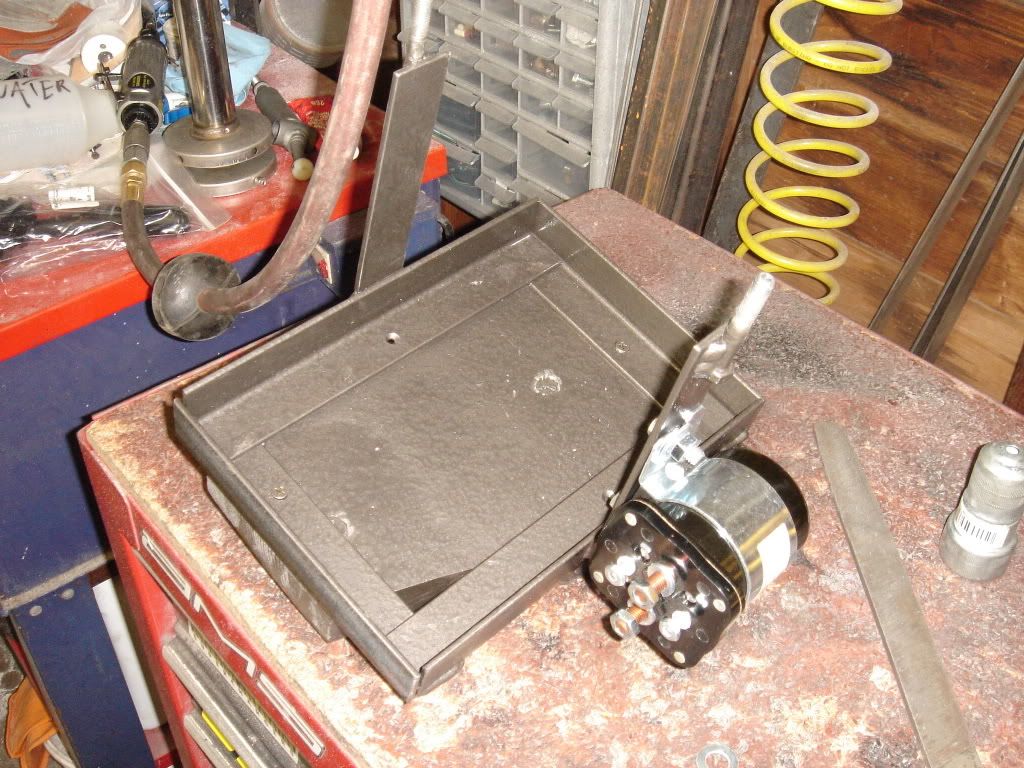
I mounted the 200A continuous duty solenoid to the tray like so:
I used 0AWG for the connecting cable. I soldered, crimped, and heat shrunk all the cable ends. Wouldn’t want one of these coming lose and giving me a nasty surprise.
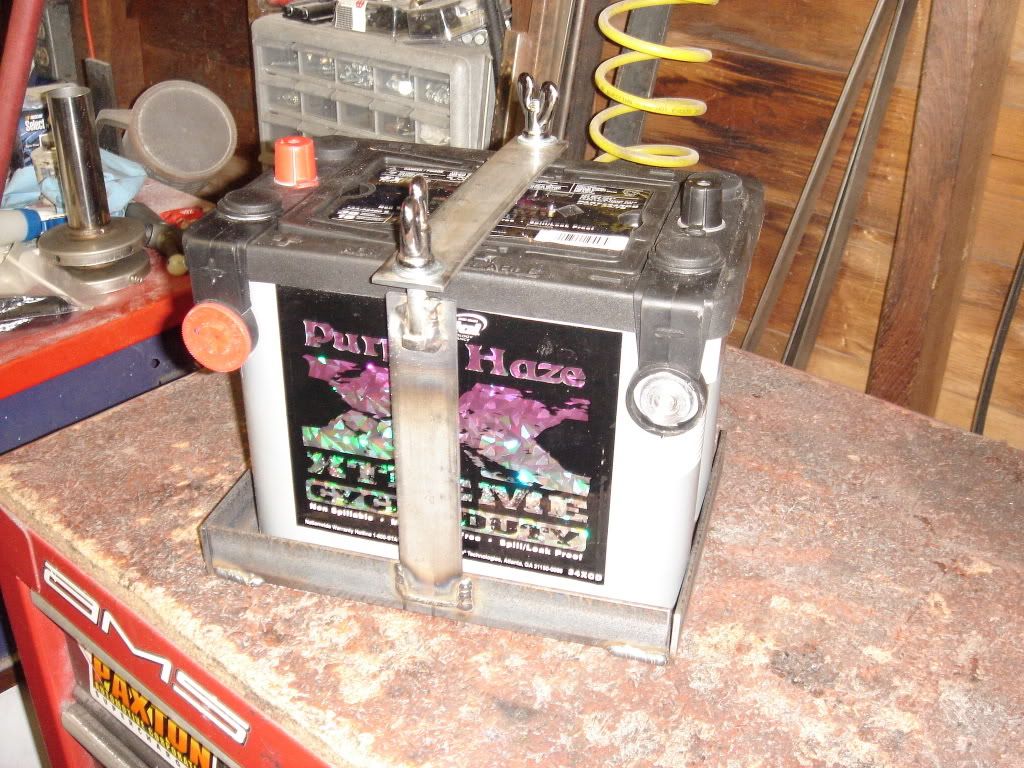
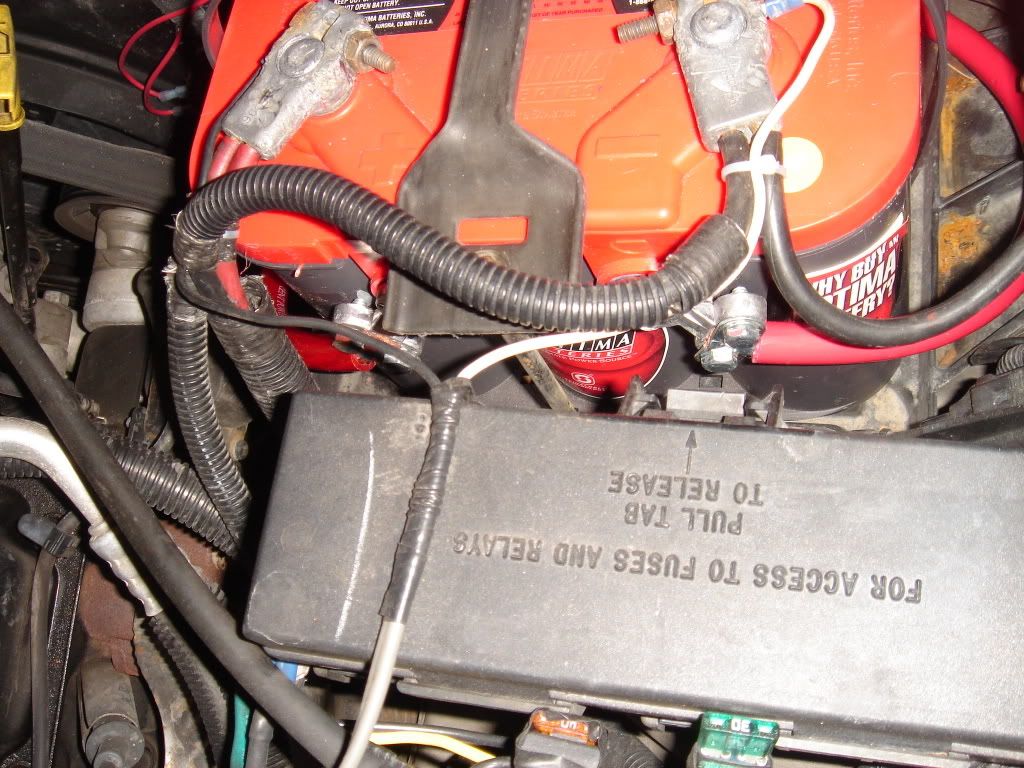
Wired the batteries in parallel. I used a red top for my primary battery. This works out nice because it’s a dual post (side post and top post) battery. So I just connected the OE cables to there normal top post location, and then I used the side posts on the red top for my parallel connection to the aux battery. On the aux battery I connected the cables to the top posts because I plan on using the side post connection on the purple haze for all my aux connections (CB, winch, amp, inverter, blah blah blah).
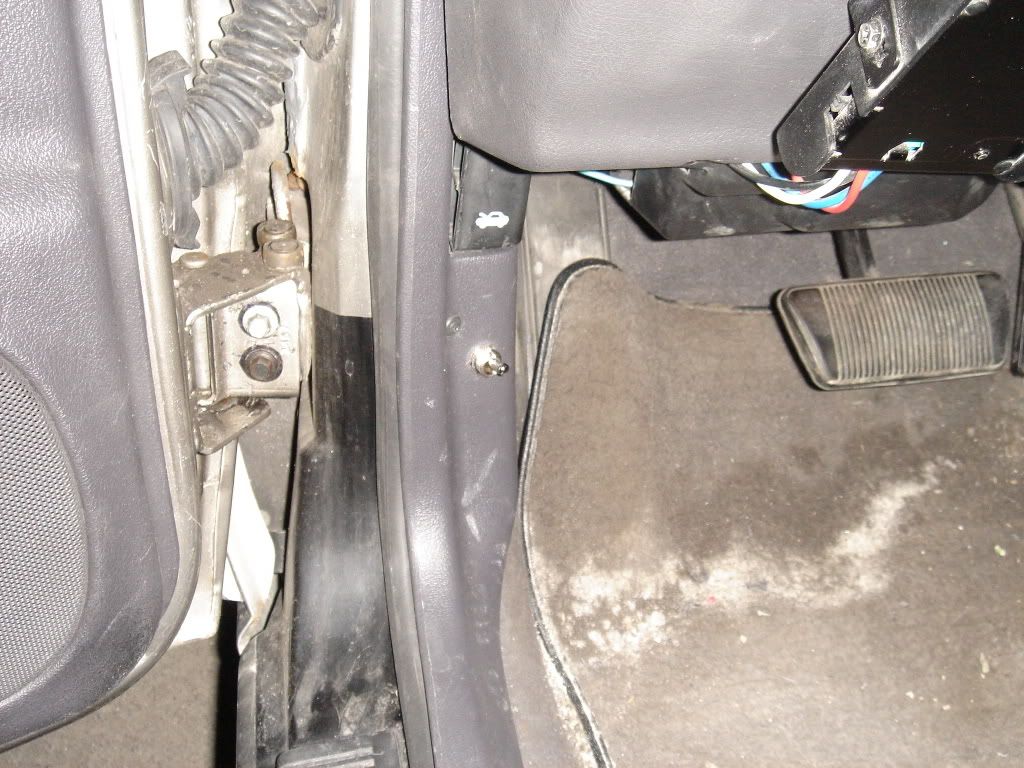
Wires from the switch to the solenoid go through an existing fire wall hole that some chuckle heads decided I needed when they installed my electric trailer brakes; I went ahead and installed a grommet for them.
I put the switch out of the way, I doubt Ill be taking it out of ignition on mode very often.
If it was not around 17 deg F the whole time I was doing this I imagine it would have been an easy day job. Freezing my ass off it took me about a day and a half.
Last edited by albersondh; 06-12-2009 at 08:09 AM.


 03-02-2009, 12:57 AM
nice!! great write up! and good looken battery box too +rep given

 03-02-2009, 01:43 AM
Great write up, but I would question the position of the switch simply because of how easily I can see your foot or leg knocking it into a different mode.
Other than that, though, great job.
 03-02-2009, 09:44 AM
like it all except the switch location.
03-02-2009, 10:17 AM
Eventually I want to make a small box to house the switch, with LEDs to indicate switch position. Ill also add a fording switch to the box that will cut power to my 2 speed fan solenoids, and another switch and LED's for the OBA. It wouldn’t be a huge stretch to even add another switch and a small screen to display switchable battery voltage.
The switch is currently placed in the quickest spot I could throw it in. It was cold as shit and I wanted to get it done. I jumped in an out a few times and kicked around a bit to make sure the old lady wont be knocking the hell out of the switch. Its not as bad as it looks, but not ideal, future plans will take care of this.

 03-02-2009, 11:22 AM
where abouts arround detriot you from? not quite as good with wiring as you, looking for some assistance on going the simaler route
03-02-2009, 12:44 PM
Originally Posted by Spr-T-23

Im in Wayne/Westland.
03-02-2009, 01:50 PM
like down river? im about 30 minutes north of macomb county in lapeer county so its kinda a hike
03-02-2009, 03:48 PM
oh, one question. what did you do about the battery temp sensor? just pull/delete the mother?
 03-02-2009, 04:43 PM
Excellent write up thanks for sharing.
Dirk
03-02-2009, 05:41 PM
The only sensor looking device that I saw while I was doing this was a metal contact spring/ring that was located under the battery. I assumed this was a part of a anti-theft device (a switch triggered if the battery is removed??). Now that Im thinking of it, thats a pretty dumb idea, but at quick glance thats what it looked like to me. I believe it only had a 2 wire harness connected to it. If this is the part you are referring to, I did nothing to it. To my knowledge a true automotive thermistor that sends usable data to the PCM should have 3 wires (power, signal, ground). At any rate, if I would have found something that I thought was a batt-temp sensor, I would have left it alone, or modified it so it would keep working. Having the PCM keep the charging in check based on temp is a big plus, and would most likely extend the service life of the battery and possibly the alternator.
03-02-2009, 10:05 PM
I up-dated my shizmatic to reflect the correct routing of the power wire to switch position 3. Previously I had the switch position 3 getting power from the primary starting battery. This was redundant and would defeat the purpose of the position 3 function (emergency start). If there is not enough power in the primary battery to actuate the solenoid in position 1 (ignition on) then switching to obtain power from the same deficient primary battery wont solve anything. The revised shizmatic now has position 3 getting power from the aux battery. This way if the primary is dead and cannot trigger the solenoid via position one, you can go to position 3 and actuate the solenoid off the aux battery, and then start off of the combined current of both batteries.
Revised shizmatic:
03-02-2009, 10:23 PM
that would be the battery temp sensor. it reads the temp of the battery and tells the PCM how to regulate the charging system.
03-03-2009, 12:44 PM
I fucked up my previous thermistor description, sorry. Im studying for my auto-elec ASE at the moment so Im getting shit jumbled up. A thermistor is 2 wires variable ground. I explained a pot/variable resistor with 3 wires previously. Sorry for any confusion.
03-03-2009, 02:02 PM
This is an awesome write-up, thanks!
05-22-2009, 12:37 PM
Great right up! I'm doing a dual battery setup right now and will be copying your aux battery mount.
One suggestion, try not to use the side posts on the Optima battery for anything other than low draw items. Right now the way you have it setup the power from the alt has to go thru the optima to reach the aux battery. The battery straps feeding the side terminals on the optima are not overly reliable.
I had a friend hook the his winch to the side terminals and end up melting them out on a long hard winch pull. Winch quit mid pull. Moved the winch cables to the top and it worked fine again. Battery was fine except for the side terminals are useless now.
05-22-2009, 12:57 PM
3 things
-thats awesome
-i need to clean up all my wires now after seeing this
-what in the world is with that intake! lol i assume thats to block water.
05-28-2009, 12:11 AM
Well I got mine done up last weekend. Pretty similar to yours. However I didn't need to build a battery tray. I found one kicking around the garage from an XJ that worked perfect.
Also I ran out of time and didn't get the dash switch mounted. The isloator is just run off an ignition source for now so the 2nd battery is isolated when the key is turned off.
I moved my cranking battery into the aux battery position and put an RV deep cell into the stock location. My thinking is that then the deep cycle battery will be the one running stuff when the key is off, the other battery will be isolated(protected) from being drained.
Only problem with this is that the deep cycle battery is now the battery being used for cranking over the engine.....
| « Previous Thread | Next Thread » |
| Thread Information |
Users Browsing this ThreadThere are currently 1 users browsing this thread. (0 members and 1 guests) |