|
|


 11-16-2005, 07:48 PM
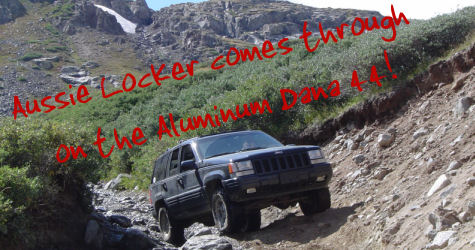
This last Sunday, Aussie Locker announced the availability of the long-awaited locker for the Aluminum 44. Grand Cherokee owners have been waiting for years for a product to come out that will take their factory Dana 44 to the next step, and it's here.
MallCrawlin will be one of the first places on the internet where you will be able to get a review on this great new product. Aussie Lockers have proven themselves in other applications, so we at MallCrawlin are extremely excited to get one in Project Next Step.
This will be Project Next Step's first modification to take it beyond the basic levels of modification. Next Step is a 98 ZJ Limited with 5.2L V8, a 2" budget boost and JKS quicker disconnects courtesy of Kevin's Off-Road and 245/75R16 Goodyear Wrangler MT/R's. Some items to look forward to in the build are of course the Aussie Locker, Kevin's LP-1 Rock Sliderz, again courtesty of Kevin's Off-Road, and much more to come.
We're anxiously awaiting the arrival of this new product from Aussie Locker and will be getting you the full scoop as soon as we can!
November 15th, 2009: Just a quick update, due to the very limited market for this locker it has been discontinued.
Last edited by BigDaveZJ; 11-15-2009 at 04:35 PM.
 11-17-2005, 12:46 AM
Looks good. Can't wait to see it in action at GSW06.
 11-17-2005, 02:20 AM
Yea bring it on.
Be sure to hit me up when you need ANY fluids for the project, I will gladly donate them (along with a couple of stickers)
The XD14450 Aussie Lockers for the D44A have arrived at the USA warehouse and the existing orders will ship today as promised.
Thank you for the orders and we look forward to your feedback.
11-23-2005, 07:29 PM
Awesome!!
If everything goes well the install in Project Next Step will be taking place on December 4th and we will initial reports after that, and will try to get some trail time in ASAP!
11-23-2005, 08:30 PM
Your Amsoil has been ordered you should receive it in a few days
12-01-2005, 03:07 PM
The locker and the Amsoil both arrived in the mail yesterday and the install will be happening on Sunday!
 12-02-2005, 06:05 PM
I guess this means I'll finally have to start my own thread in the members rig section huh? I've got the pics of her stock. . . Guess we need to start the story.
Looking forward to the install on Sunday.
Thanks Aussie Locker!!!
Looking forward even more to the first test on trail! GSW will be a blast this year! And the Pre-run won't come soon enough. It'll be nice to put the locker through it's paces in Moab.
12-04-2005, 06:47 PM
We dove into it today. Got to the good part, and lo and behold, the fawkin bolt that holds the cross pin was sheared. It didn't happen when we were taking it out, so it must've been that way for a while. So all we ended up accomplishing today was changing the rear diff fluid and the rear brake pads, LOL. We didn't put the Amsoil in yet, gonna wait till the locker's in to do that. We do have some pics of the start of it though, and those will be up sometime here soon. Also some good pics of the locker.
12-04-2005, 06:53 PM
Yup...she's a ho bag. . .
 12-04-2005, 06:57 PM
Pam, you're Jeep has an attitude problem!
I'll have the carrier from my old axle sent your way shortly so you can git' 'er done.
12-05-2005, 02:46 AM
ya think??? I told you I always end up calling her a ho bag when we work on her. . .Originally Posted by OverkillZJ
Thanks Matt...preciate it. Looks like we'll be cranking up the garage heater on Christmas Eve to try and "git' 'er done"
12-06-2005, 03:35 PM
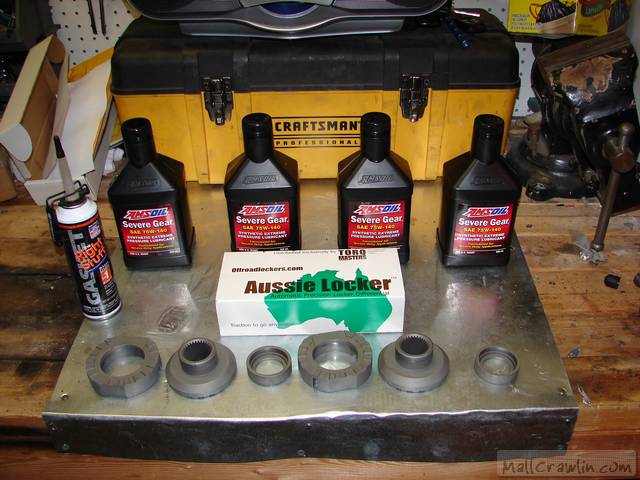
Here's how far we got on Attempt #1. Alot of this stuff is designed to help supplement the installation manual that comes with the locker itself.
Here are our implements of destruction. Amsoil Synethetic Gear Lube from Dirk aka Cue-Ball from www.4x4oil.com, Right Stuff RTV, and the Aussie Locker itself. Note the very simple, yet strong, design of the locker.
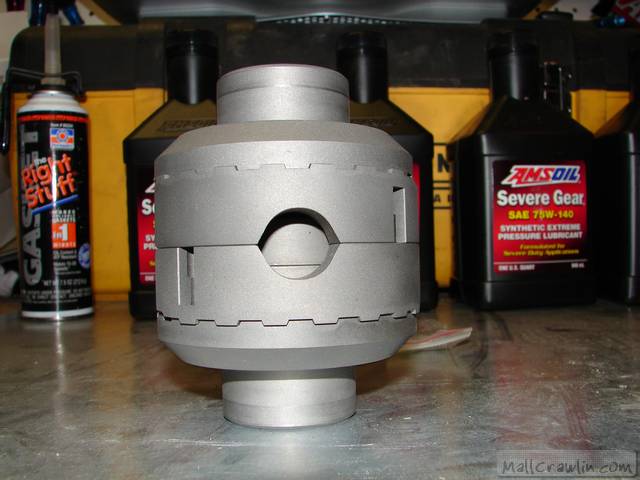
Here is the locker "mocked up" without the springs or pins that actually make it work.
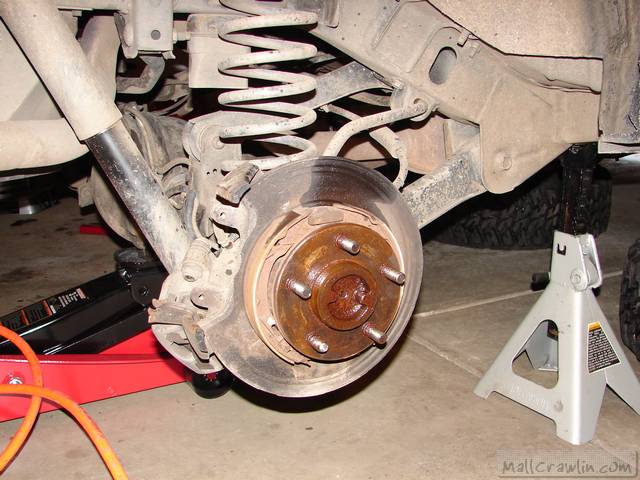
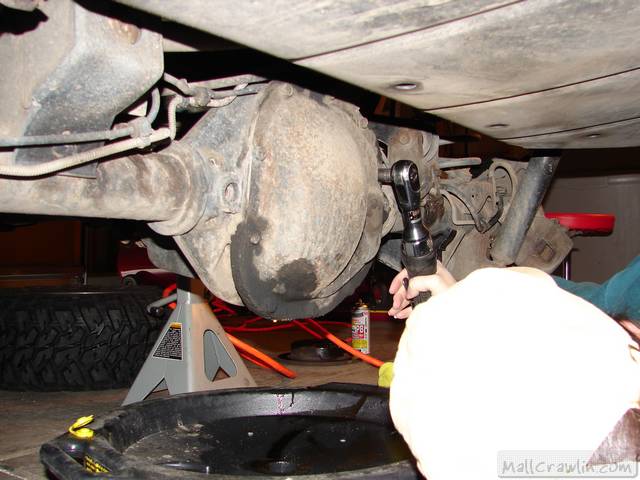
We jacked up the ZJ and put jackstands under the frame, then allowed the axle to drop a bit, and put jackstands under the axle tubes as well. Being as Next Step only has a 2" Budget Boost right now, the differential is slightly hidden by the gas tank skid, so we lowered the axle as far as the suspension would allow to give us room to work.
Once you have the vehicle safely on the jackstands, remove the wheels and tires, as well as the brakes.
With a C-clip axle like the ZJ's Aluminum 44, you need to remove the brakes in order to push the axles in to remove the C-clip, which we'll get into later.
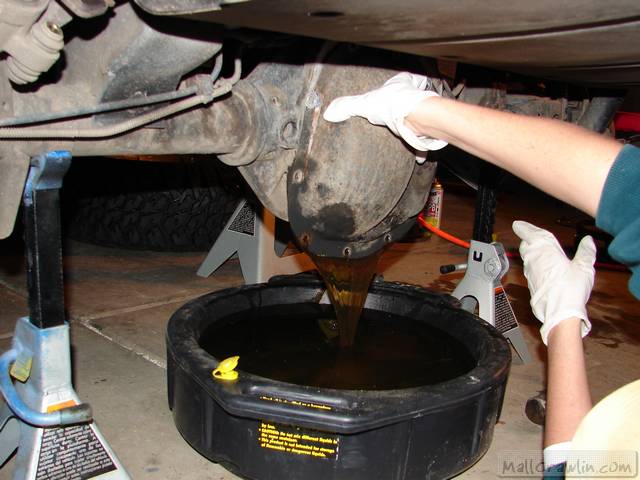
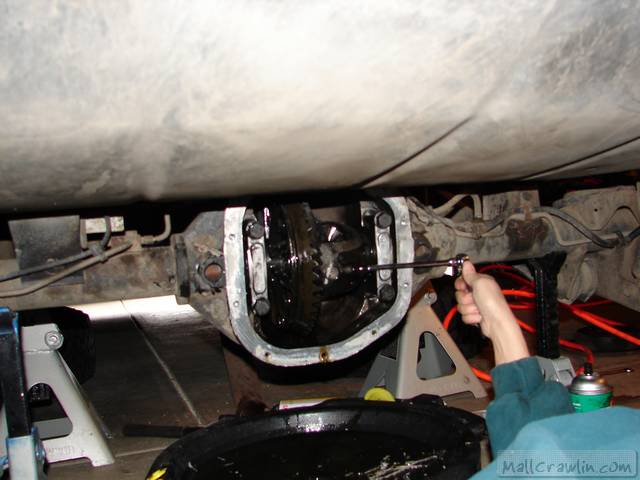
Once the brakes are removed, move on to the diff cover. I always like to put a drain pan under the diff as soon as I start undoing the diff cover bolts just in case it starts dumping fluid a little sooner than expected.
The diff cover may or may not come off just by taking the bolts out. It may take a little convincing with some light tapping of a hammer. Once you have broken the seal on the diff cover, fluid will begin pouring out.
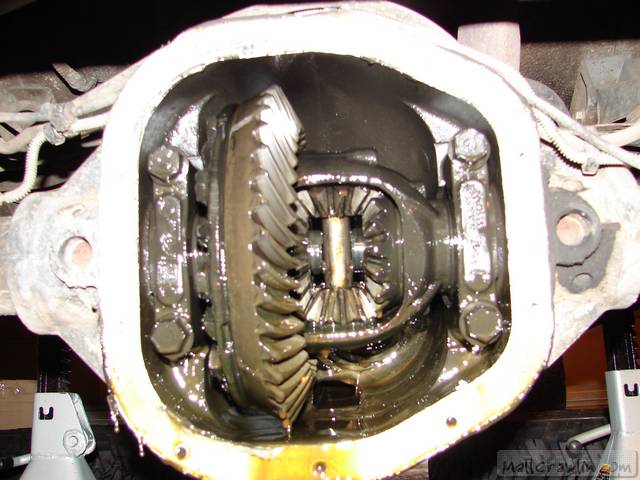
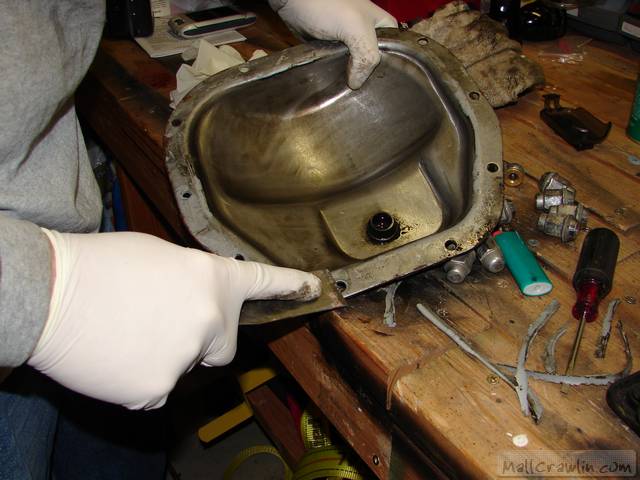
Here is the inside of the Aluminum Dana 44. With the Aussie Locker being a "lunchbox" locker, it is a very simple install in that you only need to remove the spider gears to install it, rather than the whole carrier.
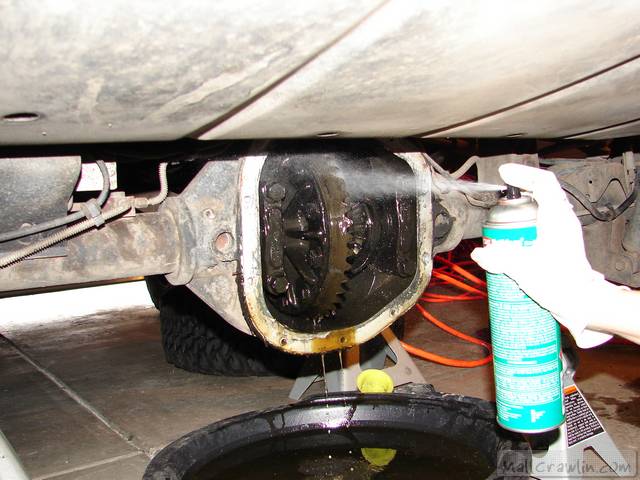
Before we remove the spider gears though, there's a couple things we still need to do. It's always a good idea to clean out the diff as best you can of the old fluid and any metal particles that may be in the diff. I like to use non-chlorinated brake cleaner for this. Be sure to be in a well ventilated area when using brake cleaner.
Another thing to make sure of is that the surfaces of the diff cover and the diff itself where they mate together are as clean as you can possibly get them.
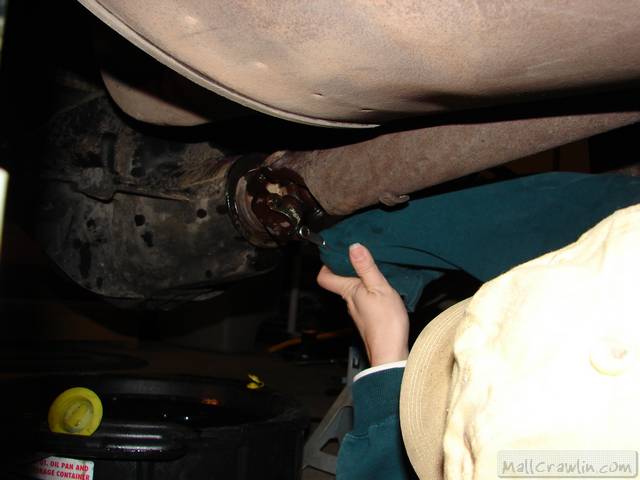
To make working inside the diff a little easier, we also removed the rear driveshaft to allow us to turn the carrier inside the diff.
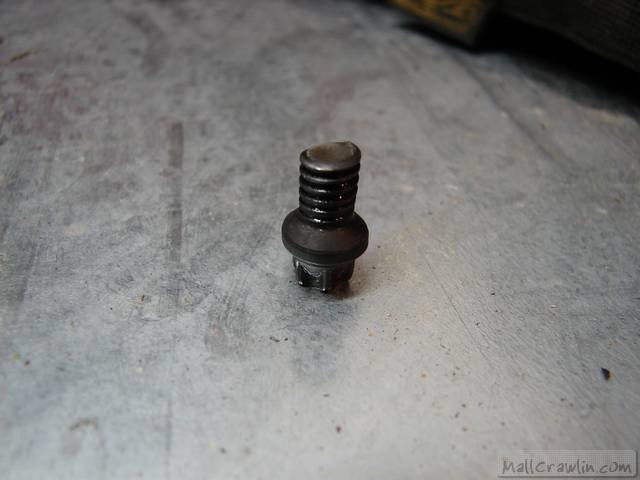
From there, you can either use the pinion yoke or the the carrier to turn things around to get to the bolt that holds the cross-pin in place in the carrier. This is a special kind of bolt, basically a reverse torx, but with care a regular 6-sided socket can be used. Remove this bolt.
And then hope to hell that the bolt does not look like this when removed:
This bolt is supposed to several inches long, and frankly, it's not. It sheared inside the carrier and pin somehow, long before we tried to take it out. We had several options at this point, only one of which got Pam's ZJ back into driveable condition so she could go to work the next day. So we put it all back together and pushed off the install a couple weeks so we can get another carrier and bolt. We could have removed the carrier and drilled out that bolt when we did all of this, but then we had no bolt to put it all back together with, so we left it. Current plans have the install slated for Christmas Eve!
12/24/05 Update
Took another shot at it today. Got the blasted bolt ALMOST out, but couldn't get it the last couple threads. Tried drilling it, tried easy outs, kept trying the picks we used to get it that far . . . . . and nothing. So yeah, I'm ready to light Trixy on fire right now and just get the insurance money!! I wish . . .
So we have a couple options left right now. Hack up the carrier with to get the pin out and replace the carrier, or take it to a shop and see if they can do any better. Not sure what we're going to do at this point but we'll let you know!!
Last edited by BigDaveZJ; 12-24-2005 at 07:12 PM.
12-10-2005, 02:57 PM
Alright, little update for everyone. Got a new bolt on the way and from my research this should actually be a very easy fix getting the old bolt out. Apparently there's only another couple threads actually holding that bolt in, so we're going to try rotating it out with a pin rather than drilling it out. I've talked to a couple mechanics who have done this with great success, so I'm looking forward to getting that taken care of and avoiding pulling the carrier!
Should have another update in 2 weeks when we get ready to dive in to this again. Can ya tell I'm anxious to get it in there??
 12-12-2005, 04:28 AM
Dave, for your sake, I hope it does come out easily. If it doesn't, you have 220 now, don't you? My plasma can get that right out of there! LOL!!
 12-13-2005, 11:28 AM
Hope your luck is better than mine.
When i did my 8.8, I had to destroy my carrier to get the bolt out.
Tried the pick, tried to drill it out. A mix of a bad angle and then a broken bit and I replaced the Carrier.
12-13-2005, 05:02 PM
snap on makes reverce cut long bits that work great for removing these damn pins...
but let me know if you want a new oe carrier, Im a mechanic for a jeep dealer in MN. I can hook ya up with one...
later
joe
Last edited by ctx46; 12-13-2005 at 05:18 PM.
 12-17-2005, 05:38 PM
I had that problem, and I ended up using my stick welder to melt out the end of the pin. After I got the pin out, I took it to work and built it back up with a mig welder and turned it down to size on a lathe. Then I got a socket head screw at the hardware store, it was something like 1/4-20.
 12-17-2005, 06:22 PM
You can pull the carrier out still even with the crosspin in, right? If so, I'd pull it out and put it in a vice and then just pound the cross pin out. I bet you can break the bolt.. it's pretty thin and not hardened or anything I don't think.
12-17-2005, 06:41 PM
That would work just fine on a non C-clip axle . . . but you gotta get that pin out to get the cross shaft out to get the c-clips out to get the shafts out to get the carrier out.
12-17-2005, 07:51 PM
Doh! It's gonna be a real bitch to drill that out, too. There's like NO clearance to fit a drill in there. Hope that pin trick works.
12-24-2005, 07:13 PM
See the 12/24/05 update in the first post.
12-24-2005, 07:26 PM
Dave,
Sorry to hear that. Sounds like me and my leaking tranny problem, it never seems to end does it??
 12-24-2005, 09:35 PM
bummer
i'm sittin here trying to think of ways to get that damn thing out
12-24-2005, 10:57 PM
Guess I'll be sending you my cerrier, eh?
| « Previous Thread | Next Thread » |
| Thread Information |
Users Browsing this ThreadThere are currently 1 users browsing this thread. (0 members and 1 guests) |